Asus Router - VPN Client setup / PPTP
ASUS Routers with OpenVPN and PPTP VPN client:
Asus RT-AC66U, Asus RT-N66U, Asus RT-AC68U, Asus RT-AC87U, Asus RT-AC3200, Asus RT-N18U
ASUS Routers with PPTP VPN client only (no OpenVPN):
Asus RT-N16, RT-AC56U, Asus RT-AC51U
Note: Asus may have other router models with VPN Client support not listed above.
When buying new Ausu router, check router model specifications here: https://www.asus.com/Networking/.
Find the router description, navigate to its "Specifications" page and search for "VPN client".
You should be able to see something like this:
VPN client : PPTP client, L2TP client, OpenVPN client
Note that specs offten mention things like "VPN Support: PPTP Pass-Through" or "VPN Server" etc.
These DO NOT NECESSERILY mean that router have VPN capabilities.
If unsure, contact us with your router model number, we will check it for you.
Configuration
First you will need to login to your Asus control panel. To do so, type http://192.168.1.1/ in your browser and login with your Asus username and password.
You will find this information on the sticker on the back of your router.
(admin / admin if router is new or reset to factory settings)
Note: If you have a router that is already using the above mentioned address, the default address for Asus should be http://192.168.2.1/
Basic Internet setup
Before we begin the setup for the VPN connection, lets make sure your router is configured to access the internet.
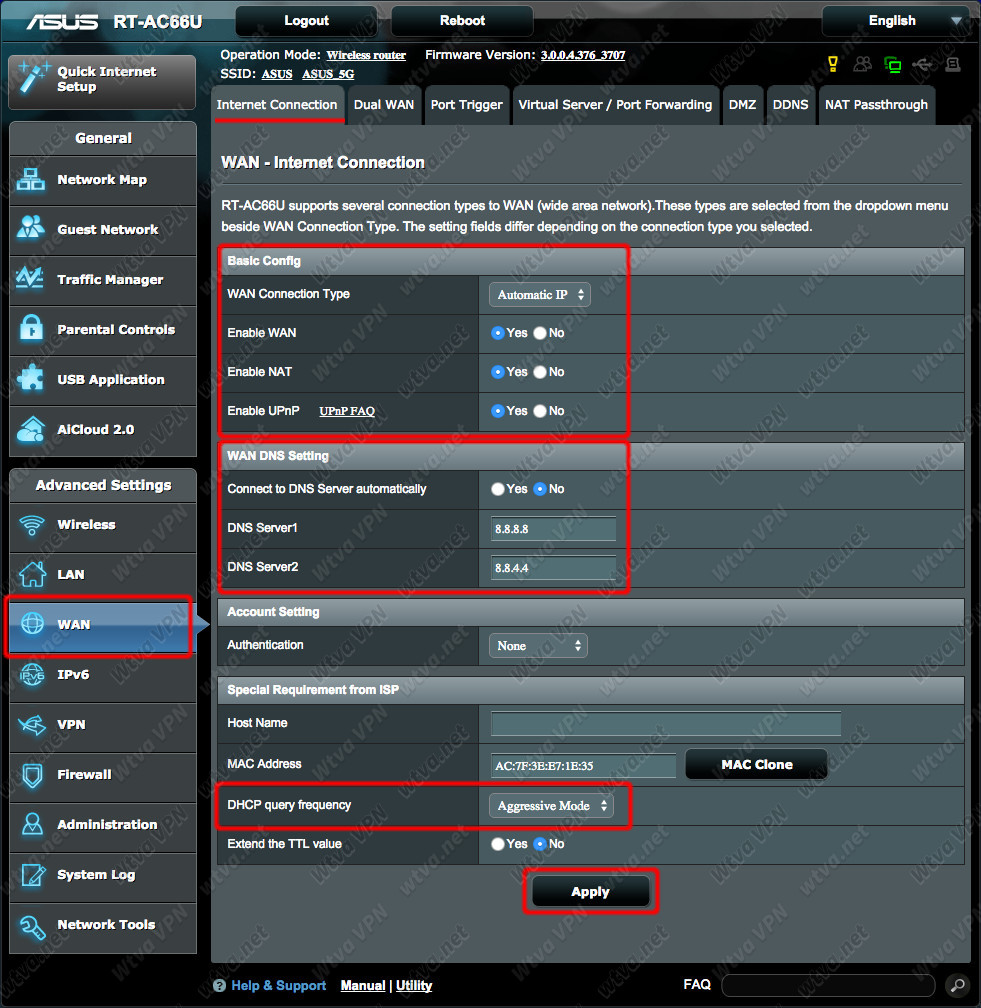
Please navigate to the
"WAN" tab in the left-side menu and click on
"Internet connection" in the top menu bar. Here you will be able to modify your DNS settings. So edit your settings as explained and shown below:
1. Wan Connection type: Select "
Automatic IP"
2. Enable WAN, NAT and UPnP options
3. Connect to DNS Server automatically: Check "
No"
DNS Server1:
8.8.8.8
DNS Server2:
8.8.4.4
4. DHCP query frequency: Select "
Aggressive Mode"
5. Once you have entered all the settings needed, please double-check them (they should be set as in the image below) and click "
Apply"
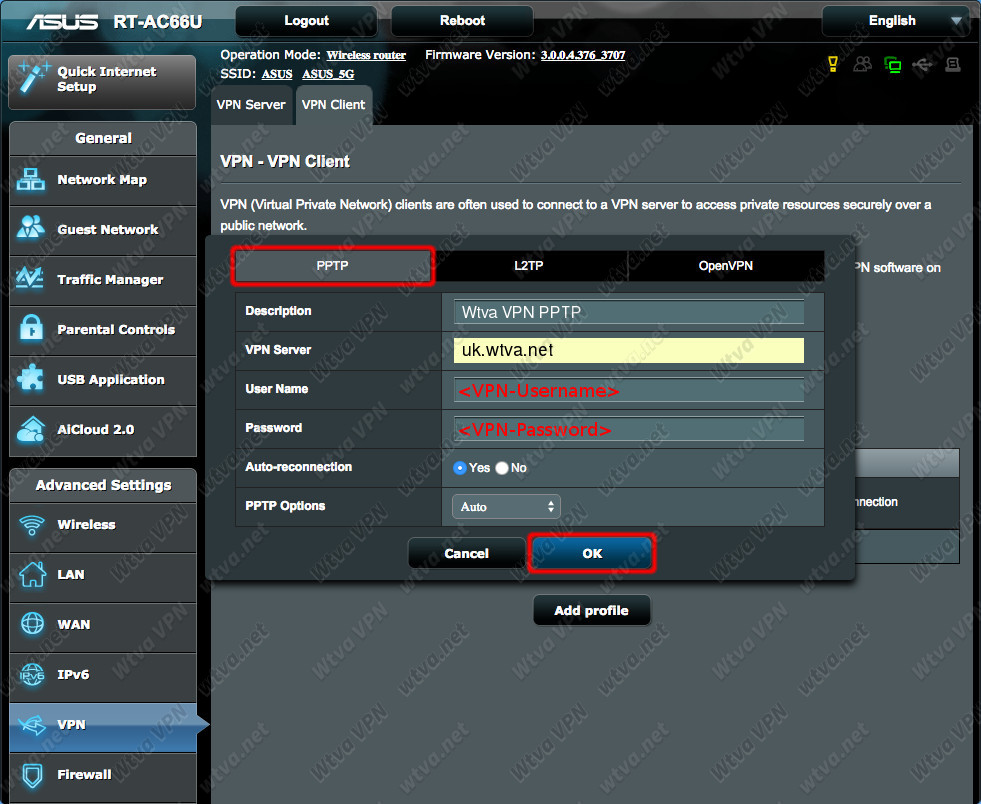
VPN configuration
Now, to begin with the setup: choose the "
VPN" tab from the left-side bar and then click on "
VPN Client" in the top menu bar. When this page opens, click on the "
Add a profile" tab as shown below:

This will open a new windows where you will edit the setting fields, allowing you to create a VPN profile.
So carry out the following:
1. Choose "
PPTP" from the top of that window
2. Description: Here you can type whatever you want, e.g. "Wtva VPN PPTP"
3. VPN Server: Enter "
uk.wtva.net"
4. User Name and Password: Enter your
VPN-Username and
VPN-Password as shown in the yellow box below
5. Auto-reconnection (if available): Choose "
Yes"
6. PPTP Optins:
Auto
7. And when you're done, click "
OK"
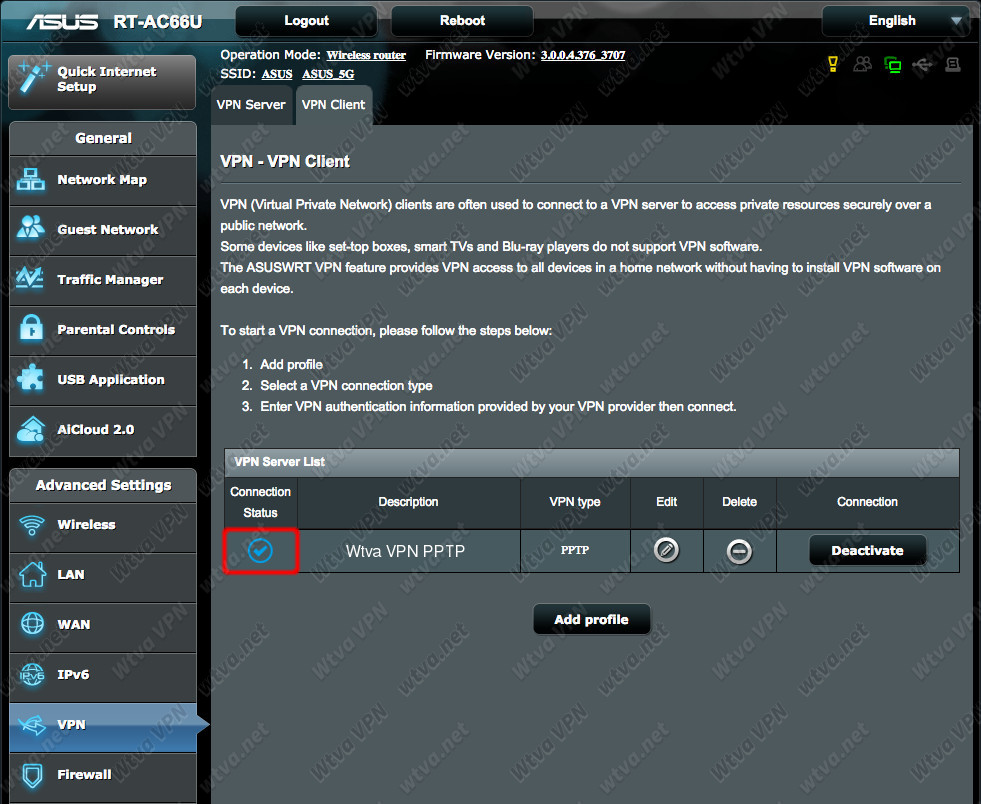
Connection
Now that you have created a VPN profile, you can click "
Activate" to connect to the VPN server.
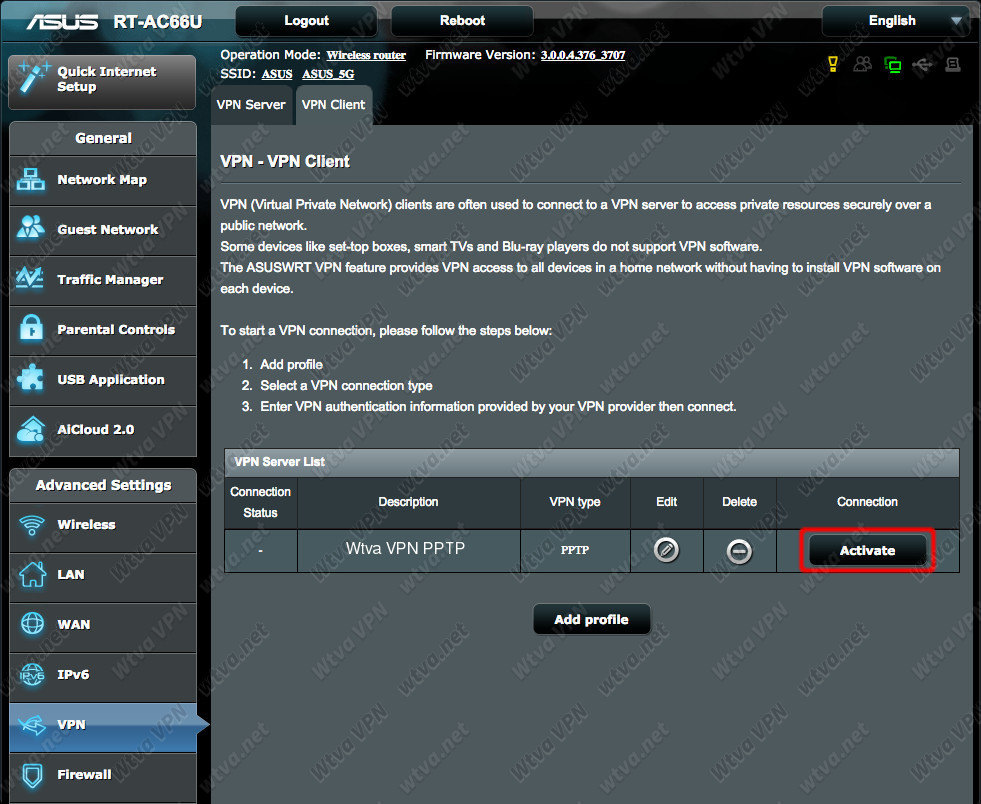
Now watch the "
Connection Status" change, as shown below. It will take no more than a minute.
 United States